
Graphic Artist. Cat Person. Singer. Geek.

This tutorial was written for me by Zan. She's a brilliant artist and extremely helpful!
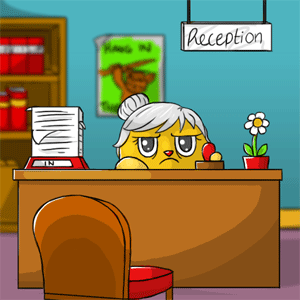
There are 100 ways to shade. I won't try to list them all but I will try to list a few tips within cel shading (often misspelled as cell shading). This is the main shading technique of comic books, anime, cartoons (such as Disney) and Marapets. What signifies the cel shading technique is the typical flat color used to shade. That means there is no blurring or gradients or any kind of texture within the shading. An example of this is the Town Hall receptionist.
Here you see the straight clean shading - here in 2 layers. There's also some highlighting and the characteristic white line also highlighting. This is typical Marapets in the later years but it's not something common in cel shading.
To help you understand where to shade I'll explain shading basics. The ball beneath is usually what you will find if you Google "shading". It shows how you need to shade according to the shape. You need to envision your drawing as a 3D object to see where shading should go.
*Tip* Never EVER use the burn tool to shade. It might seem like a cool tool to use but it hurts to look at and no, it doesn't make it look professional.
*Tip* Unless you shade with black it's necessary to experiment with shades to make it look right. Black is not a color recommended for shading since it makes the drawing look dark and muddy looking. Try experimenting with different colors. I'll get back to this later.
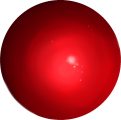
Can you see all the different shades of red and pink in the ball? This is a also a good figure to show shading/highlighting of metal, skin and other smooth surfaces.
I can use the example of this ball shading for example fur/hair. *Note: this is not a cel shading technique but will show you how you can use color besides the base color and white/black to a make a cool effect. However, if you're only here for cel shading you can skip this.
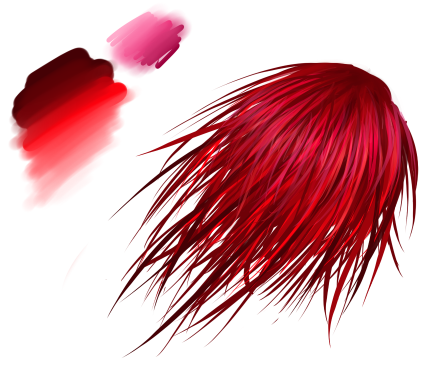
Realistic Fur Shading
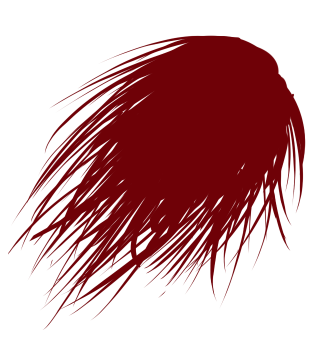
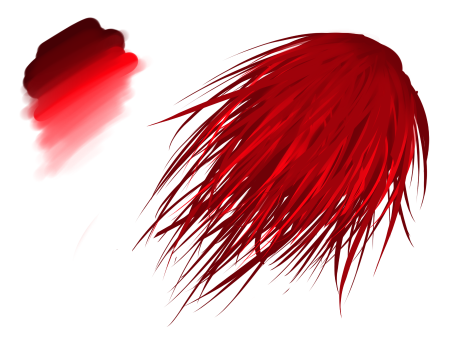
I start off with a base color which should be darker than the color you want the fur to be. Then I put some colors on the canvas and blend them to get all those nice colors in between. (These are the same colors I used for the ball.)
*Tip* Make sure to blend all stray hairs and also the top/roots of the hair. This will help later.
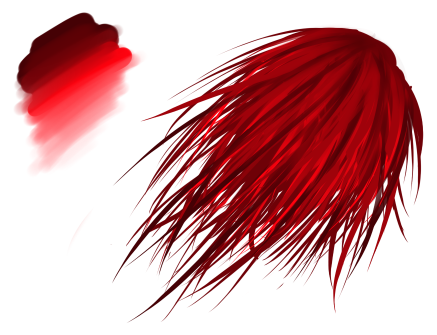
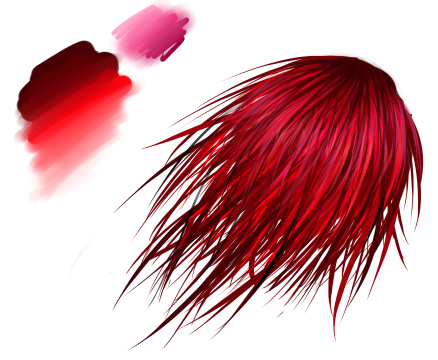
Here I first put in more dark hairs from the darkest of the blended colors and then highlights in light red and pink from the other blend I made. This is to start building a place where I want the hair to bend so it looks like it's roundish like the top of a head.
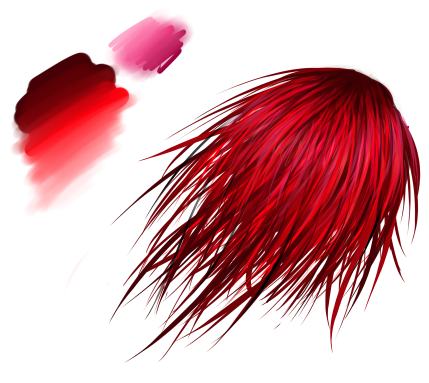
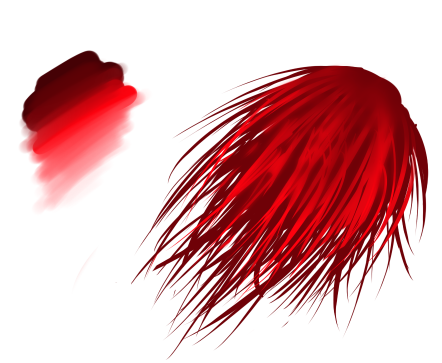
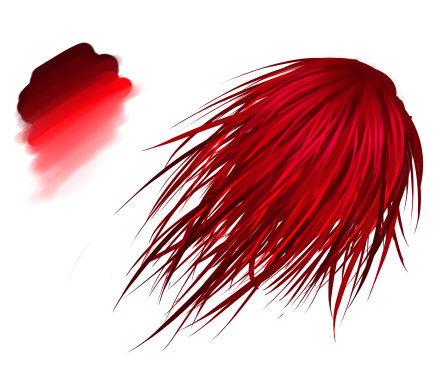
I continue by adding some more layers of highlighting pink and also some more of the darkest color to make that contrast more visible. Notice how that pink highlight makes it seem more "alive"?
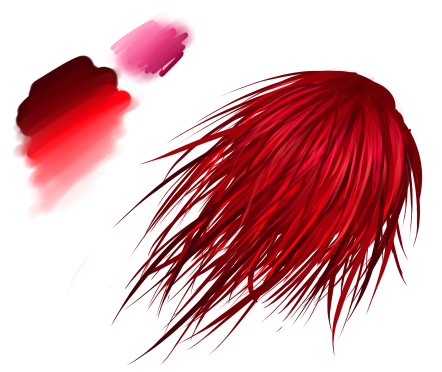
Complimentary Colors
You can use the different shades of color(s) to make this effect with all the different base colors you can think of. You can also use a different color for shading or highlight than the main base color. For example in the image above with the red as base and pink as highlight I couild also use purple as shading. Here are a few examples of color palettes you can use to achieve this effect.
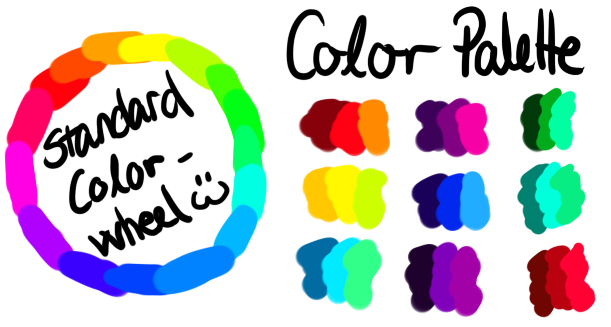
The colors opposite each other on the wheel are called complimentary colors as they usually make the other stand out. Example: orange and blue are complimentary colors.
Light Sources/Highlights
But anyway, back to cel shading. How the cel shading looks depends on where you want the light source to be. Right-handed artists usually have their light source in the top right corner and left-handed in the top left. Before you start shading/highlighting you need to find out where your light source will be. You can also try out different ones till you find one fitting the Pose.

*Tip* If you want to make a white color look more white you should make sure to have some blue in your shading. But you don't want it to be bright blue; you need a mix of gray and blue.
*Tip* If you draw on paper you should shade from left to right (if right-handed) and from right to left (if left-handed). This is so you don't accidentally smudge your work.
*Tip* If you draw digitally it can sometimes be easier to use the eraser for lighting/highlighting. To do this you need to duplicate the base layer and put it above. Change the bottom layer to the color you want to show up as highlight. Use the erase tool on that duplicated layer to do your highlighting.
You can also have more than one light source in which case you would want to use colors in the highlights to differentiate them. Here two complimentary colors (like I mentioned earlier) would make a magical touch! However I won't have time to explain this 100%.
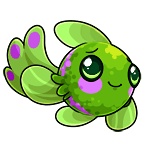
Highlighting in cel shading is optional. This depends on your all-around style as it sometimes looks best without highlights. Mara art often does not have highlights at all or very little. Example: Red Ideus.
I found this old figure from 10+ years ago. It's not precise, but it gives you the idea.
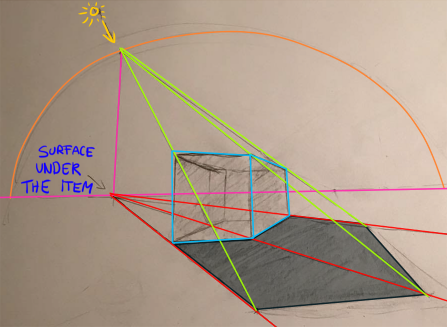
*Tip* If you have more than one light source and do not use a corner I would advise you to draw it on the paper in pencil (if on paper) or on a separate layer (if digitally drawing). The light source is usually drawn as a sun or an arrow.
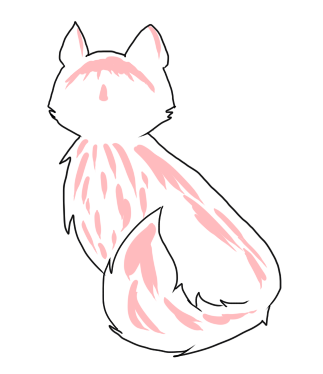
Picture: The red marks show where highlight could be.
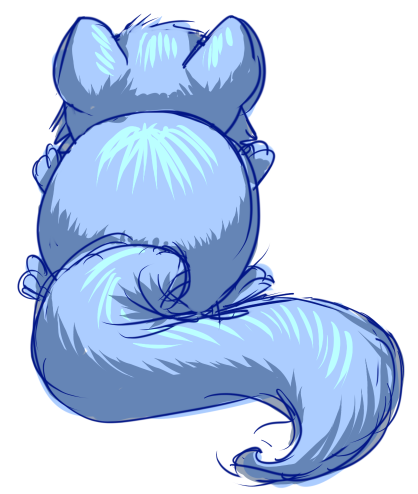
Some of the more recent Mara art has more layers of shading, some up to 3-4. This gives it more depth and make it more realistic looking. Examples: Green Fasoro and Equilor.
(Do you see the resemblance to the ball I drew earlier?)
When I draw fur I usually decide my light source should come from the top right corner or from above. Depending on the angle of the creature or item itself you should try out several light sources to see what compliments it best.
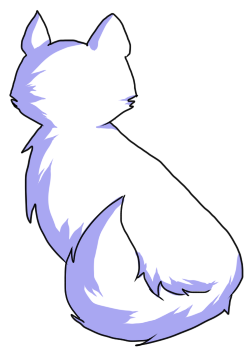
I tried to make an example of how to shade this cat using blue shades to make it more obvious.
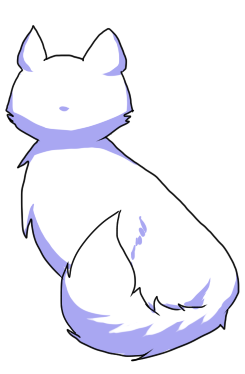
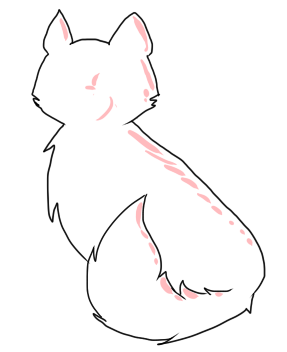
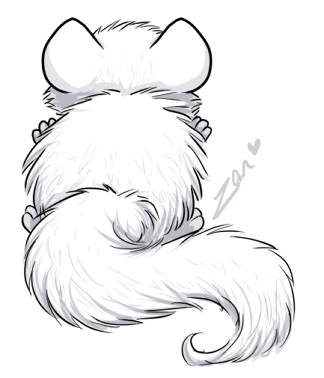
Here is the finished product though I ended up making it white with no highlights.
I hope this helps! If there's anything you're missing or want to know, feel free to mail me!
~Zan