
Graphic Artist. Cat Person. Singer. Geek.


This tutorial was created for the now-defunct site Chimara which explains the text on the avatar. To best understand this tutorial you will need basic knowledge of Adobe Photoshop and how layers work. This tutorial was written using version CS6 so the screenshots may be a little different but most of the steps are still the same. If you're not familiar with layers, please read my Layers Tutorial. An updated version of this tutorial is being worked on. I used to have a GIMP tutorial but it's so outdated I removed it. If you'd like to write one or help with this one, please let me know.
For starters you will need an image. For this avatar I used the tea cup from the Dainty Teal Tea and the Teal Bath Duck (both are Marapets images). I kept each image on a separate layer so I could move the duck back and forth. More on that later.
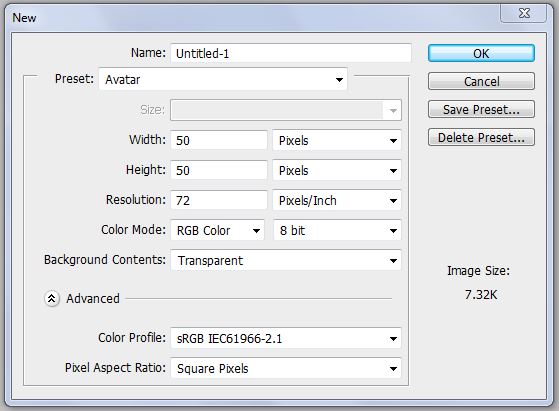
First create your image. Make it 50x50 pixels in size with a transparent background like so:
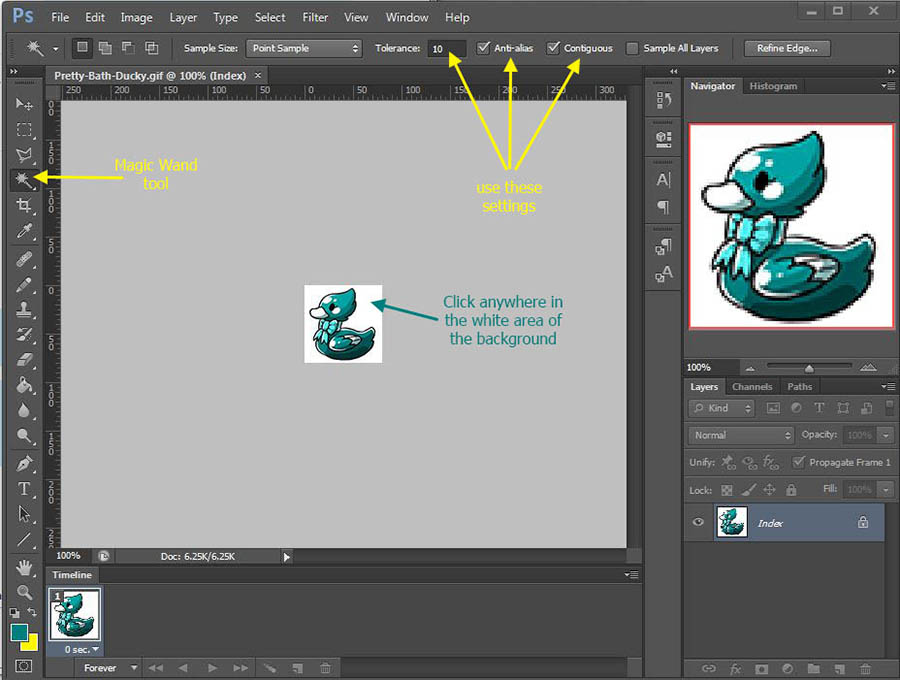
Next you will need to add your images. I removed the white backgrounds from the tea cup and the duck and put them each in their own layer. To do this, use the Magic Wand tool and click anywhere in the white background. Go to Select > Inverse and then Edit > Copy. Return to your avatar and paste the image in.
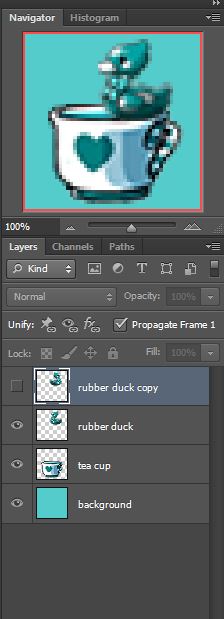
I also shrank them so they would fit. Then I duplicated the duck layer and flipped it horizontally. Finally I created a fourth layer, named it "background" and filled it with a color from the middle of the duck.
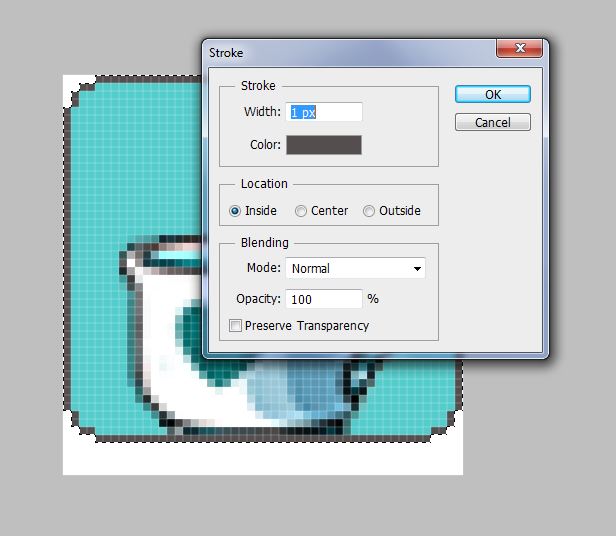
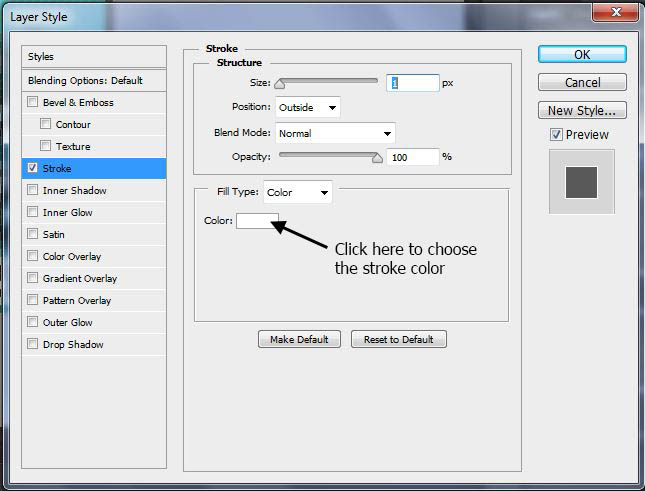
The avatar needs a frame and some text. I'm going to start with the frame. Create a new layer at the top of your Layers list. Name it "frame" and draw your frame. I added the white corners and white bottom border first. Then I held down the CTRL button on my keyboard and clicked the frame layer to select all the white bits I just drew. Go to Select > Inverse to select everything EXCEPT the white bits. Then go to Edit > Stroke and stroke the inside by 1 pixel:
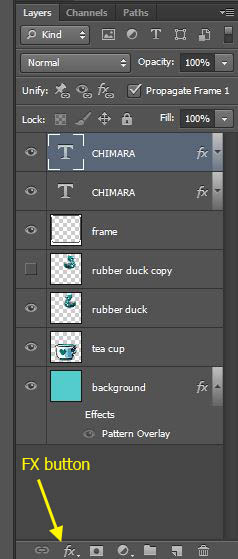
Now it's on to the text. I chose the color black and used the font 04b03 at 8pt with the anti-aliasing switched to "None". I typed my text, centered it and then stroked it in white. To do this, highlight the text layer in your Layers palette, click the FX button underneath and choose "Stroke". A box will pop up where you can select your stroke options.
I decided I wanted a double stroke on the text so I duplicated the text layer and did a 2px stroke in a dark teal on the bottom text layer. Once all of that is done you should have something like this:
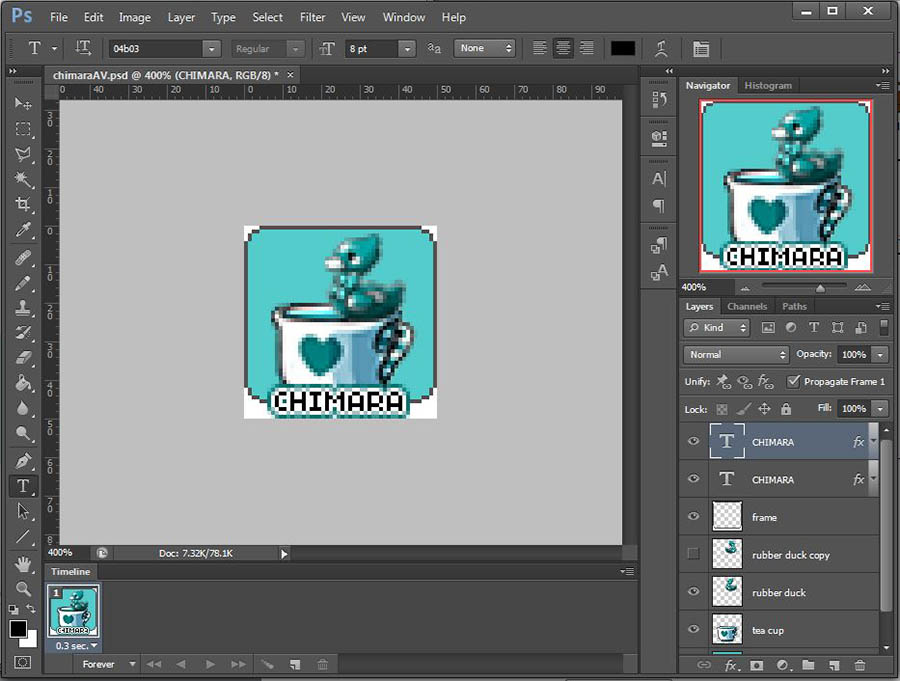
I thought the background was boring so I clicked the FX button for that layer, chose "Gradient Overlay" and added some diagonal white scan lines. This is completely optional but I needed to explain where they came from before we move on to animation. I opted to just move the duck back and forth and leave the text alone. I originally planned to animate the text as well but with the double stroke and the duck "swimming" it would have been way too busy.
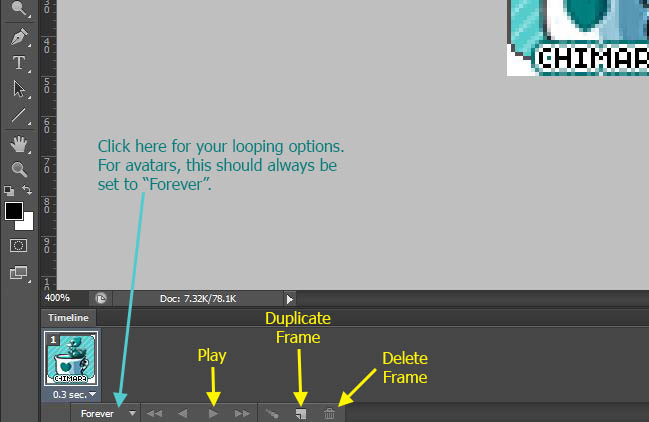
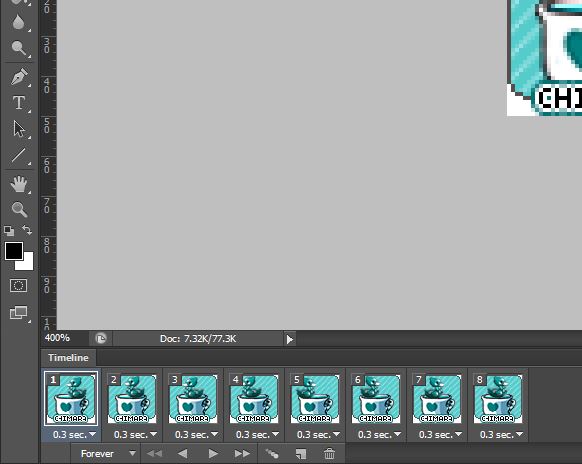
To animate you will need your timeline visible at the bottom of your screen. If it's not there, go to Window > Timeline to turn it on. The first frame is already there by default. Make sure all your layers EXCEPT the duck copy are visible. Under the first frame it will say something like 1 sec. That means that frame will stay displayed for 1 second. That's too long for this avatar so click that 1 sec, choose "Other" and set the delay for 0.3 seconds.
At the bottom of the Timeline are your controls and they look like the buttons on an iPod. Click the button that is second from the right to duplicate your current frame. It looks like a piece of paper with the corner turned up and is just to the left of the trash can.
You should now have 2 identical frames in your timeline both set to 0.3 sec. While the second frame is highlighted, move the duck layer to the left by 3 pixels. Duplicate the layer again and move the duck another 3 pixels. Do it one more time. You should now have 4 frames in your timeline. Duplicate the frame but in frame 5 you want to turn OFF the visibility of the duck and turn ON the visibility of the duck copy layer (i.e. the duck facing the opposite direction). Make sure the duck is in the left-most part of the cup and move him 3 pixels at a time to the right the same way you moved the other duck layer to the left. When you are done you should have 8 different frames in your Timeline. You can click the "Play" button in the timeline at any time to see your animation.
That's it. You're done. To save your avatar go to File > Save for Web and save your animation as TeaDucky.gif. You can then upload it to the internet to use wherever you please.